Fine grain filtering for meaningful monitoring support for both view and source filters based on wildcard matches of id, type, source, user, event description.
§ Filter non-essential events – collect and manage only important events – minimum traffic.
§ Filter any event(s) for display only (these are still logged into the event database).
§ Monitor only specific events.
Example,
o Log all events into the database but display only Audit Failure.
o Create a separate monitoring window for Exchange Server events.
§ Filter any specific category of events
Example, Monitor all events except information events.
§ Exclusive filters according to your own criteria
Example, Filter all Information events except defined list.
A few specific events are frequently generated but you wish to exclude these and monitor all other events.
§ BOOLEAN operators in filter policy definitions – provides the ability to match multiple strings in fields to create sophisticated filter policy definition.
EventTracker now adds the option to configure filters for Global, Archiver and Receiver in Admin -> Event Filters.
How it will benefit the user?
· All the configured filter events will now be dropped, which in turn will minimize the archive database storage.
· The user can now filter both real time and offline events using the filter types:
Ø Global
Ø Archive
· The feature will also filter out the real time events after alerting has been performed (Selecting Archive as Filter type).
· The user will also be able to configure a filter by selecting specific systems/ groups and also specific VCP ports.
How it Works?
Configuring Event Filters
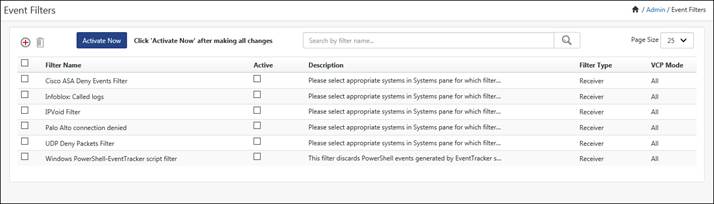
· Click the Admin and select Event filters option.
· Click the Add new icon![]() .
.
· EventTracker displays the Event Filter configuration page.
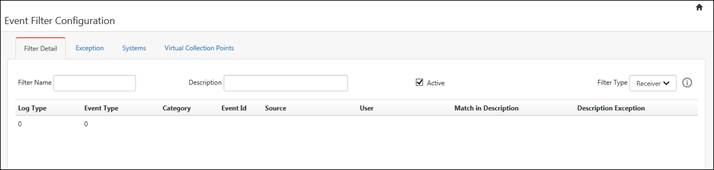
· Enter the name of the filter in the Filter Name field and a brief description in the Description field.
· Example: All error Events with Event ID
· By default, EventTracker selects the Active checkbox. Uncheck the checkbox to deactivate the filter.
· EventTracker retains the configuration settings. You can again activate the event filter by checking the “active" checkbox.
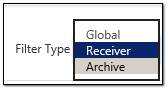
· In the Filter Type field, select Global/Receiver/Archive from the drop down list.
· By default, it will select “Receiver”.
· Click the Information icon ![]() to know more about the filter type options.
to know more about the filter type options.
· In Event Filter Configuration page, click Add.
· In Add Event dialog box, enter appropriate data in the relevant fields.
|
2 NOTE |
|
If you leave a field blank, EventTracker assumes a wildcard match for that field. For example, leaving the user field blank implies that any value in that field is acceptable. |
1. After adding relevant data, click Add.
EventTracker displays the ‘Event Filter Configuration’ page with newly added filter details.
2. Click the Exception tab.
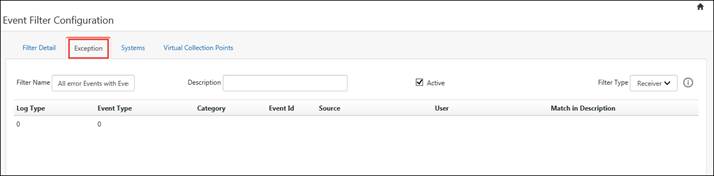
1 Click Add to add exception criteria.
2 Enter/select appropriately in the relevant fields, and then click Add.
|
2 NOTE |
|
For example, if you wish to filter out all events of Event Type- Information but interested in monitoring a particular event for example – Event ID 3223. Then in this case, all events of ‘Information’ event type will be ignored except the event id 3223.
|
3. Click the Systems tab.
All Systems option is selected by default,which means the filter is applied to all the monitored systems.
4. Select required system groups / systems to apply the filter.
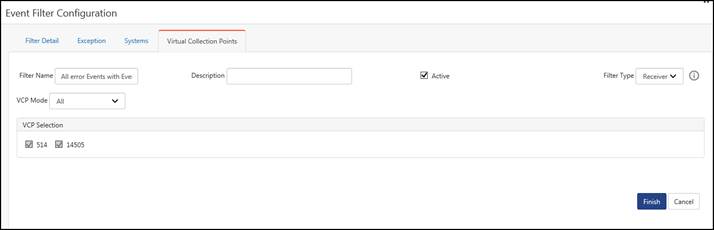
5. Click the Virtual Collection Points tab.
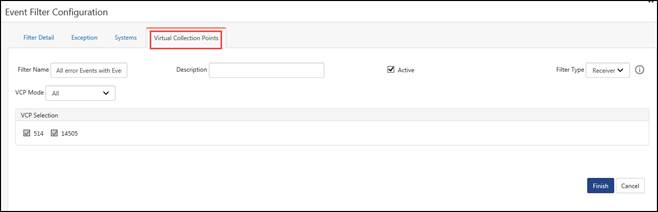
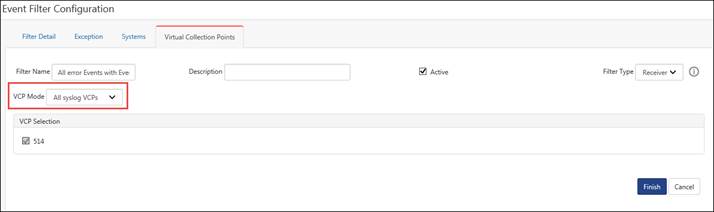
· In the VCP Mode field, select any option from the dropdown list.
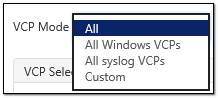
NOTE: By default “All” option is selected. On selecting “Custom” the user will be allowed to select one or more VCPs from a list of available/configured VCPs.
VCP Mode: “All” will consider both the windows and syslog VCPs for filtering.
VCP Mode: “All Windows VCPs” will consider only the windows related VCPs for filtering.

VCP Mode: “All syslog VCPs” will consider all the syslog related VCPs for filtering.
VCP Mode: “Custom “will list all the configured VCPs and based on the user selection, ports will be considered for filtering.
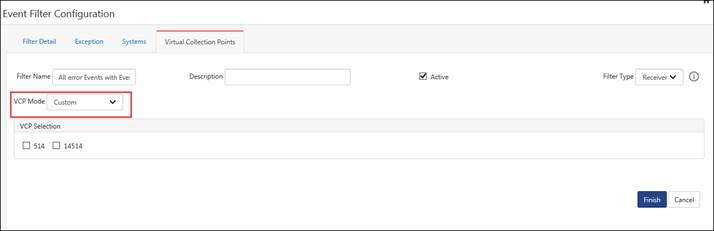
· Click the Finish button to save the changes.
The Filter name will get listed in the Event filter page.
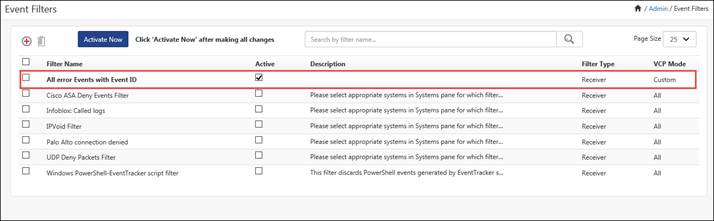
· Now, click the “Activate now” button to activate the event filter.
This section helps you understand how filters and filter exceptions work.
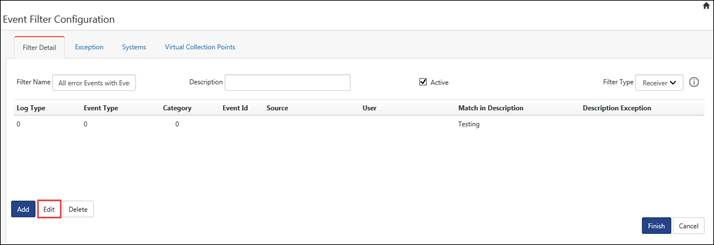
1 Click the name of the event filter.
2 In the Filter Detail tab, select the filter rule to be deleted, and then click the Delete button.
EventTracker displays the confirmation message box.
3 Click OK to remove the filter details.
EventTracker removes the filter details.
4 Click the Exception tab.
The filter exception you have set earlier remains unaltered.
5 Select the exception rule to be deleted, and then click the Delete button.
EventTracker displays the confirmation message box.
6 Click OK to remove filter exceptions.
EventTracker removes the selected filter exception.
|
2 NOTE |
|
It is obvious from the above scenario; it is your responsibility to manage Filters and Filter Exceptions. The table given below will provide you a clear idea how the combination of Filters and Filter Exceptions work.
|
|
Filter |
Exception |
Result |
|
Y |
N |
EventTracker filters all events from the view. |
|
N |
Y |
EventTracker allows all events. |
|
Y |
Y |
EventTracker allows events with exception. |
|
N |
N |
EventTracker allows all events. |
For viewing and editing filter details,
· Go to Admin
· Click the Event Filters option from the menu.
· Click on the particular filter you want to view and edit.
· Click the Edit button to modify the filter configuration.
· Click Finish, once you complete viewing and editing the filter.