Casebook is an electronic book in which users can add entries from Incidents, Reports, Change Audit, Config Assessment and prepare notes directly. A user can also auto date/sign entries.
When doing quarterly review, we can take report to remind ourselves of the 'victories'. When we do log review of alerts and reports, we sometimes come across a low disk condition, an application crash, a SQL injection attempt etc. In order to notify users, a log book is provided so that when a necessary incident/alert occurs, necessary precaution can be taken care of.
|
2 NOTE |
|
The required license has to be purchased in order to use the Casebook feature. |
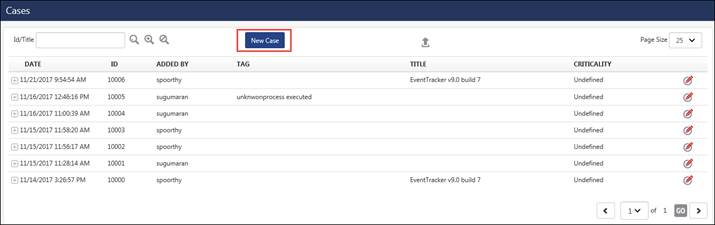
1. Log on to EventTracker Enterprise.
2. Select the Tools drop-down, and then select Casebook.
The log book displays only added entries.
3. To add a new Casebook, click New Case.
Casebook window displays.
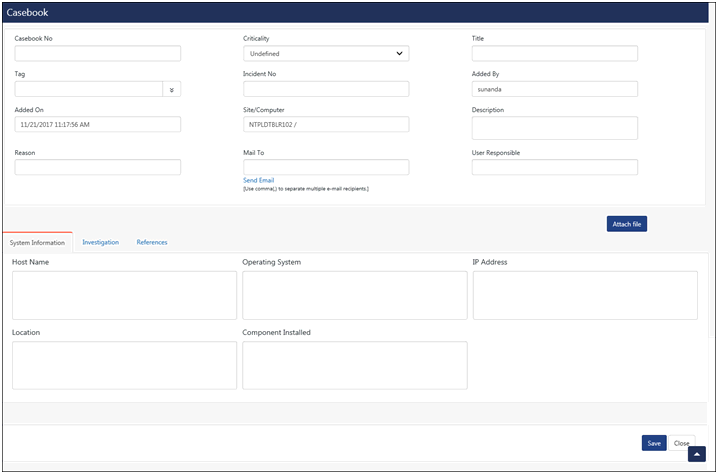
4. Enter Title of the alert/report.
5. Select Tag from the drop-down.
6. Select priority level from Criticality drop-down.
7. Enter the valid Email address in Mail to field.
8. Enter relevant information in Reason field.
9. Enter System Information, i.e. Computer Name, Owner, IP address, Criticality, Location, Component Installed, Operating System etc.
10. In Investigation pane, Impact Determined, Investigation Procedure undertaken to resolve the issue, Investigation Action Taken, Application Name that caused the problem, Host Information and Recommendation.
11. To add references, click the References tab.
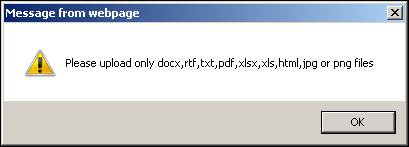
12. To add a file, click Attach file link.
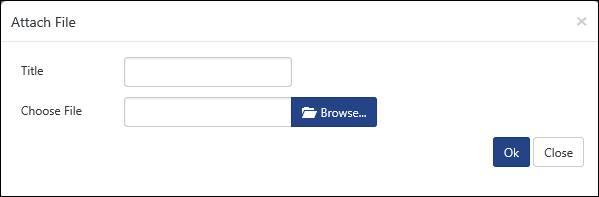
You can attach only Text, Word, Excel, PDF, RTF, HTML, JPEG, PNG files otherwise an error message displays.
13. Enter the required and mandatory information and then click the Save button.
14. To search Casebook information, click the Advanced Search ![]() icon.
icon.
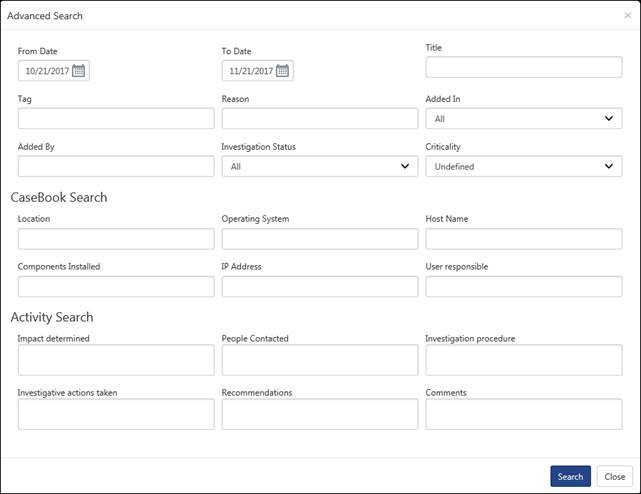
15. Enter the relevant search information, and then click the Search button.
|
2 NOTE |
|
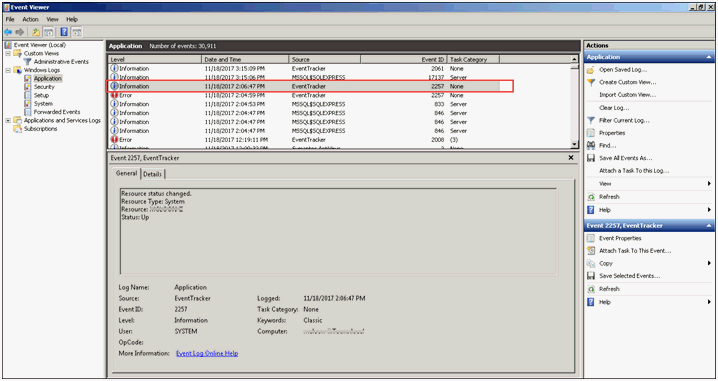
· A user has to add investigation information since it is mandatory. · System Information provides information about a particular system. · For a Casebook entry, there can be N number of activities. · A user who adds the Casebook, only can edit Casebook and others can only add activity. · A user who has created the activity can only edit his/her activity. · Others can add comments which will be shown in history. · The Casebook shows only added Casebook entry details and how to search the available Casebook entries. · After adding the log book, the user can edit Casebook completely where as other users can add only investigation details. Other users don’t have permission to delete an uploaded file and the references. · If you want to view the actions that are recorded in Casebook such as an email has been sent or an added comment or references, you can go to the Windows Event Viewer and monitor the details as shown in the figure below.
|
1. Select the Incidents option, and then select the Tabular tab.
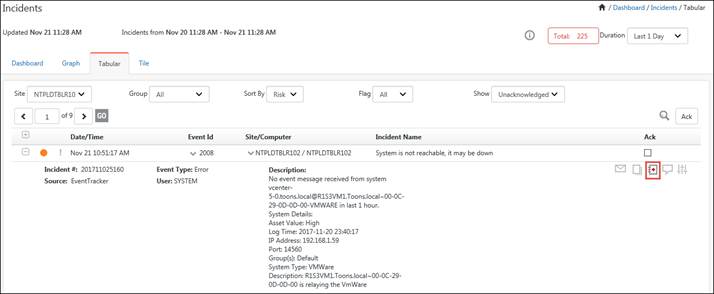
2. Select any incident and click the Casebook ![]() icon.
icon.
3. The Casebook window will ask you to either Add new/ Add to existing.
4. Select Add new.
Casebook window displays.
5. Enter the relevant information i.e. Reason, Investigation information, Mail To details etc.
6. If required, update the Criticality of the incident.
7. Click the Save button.
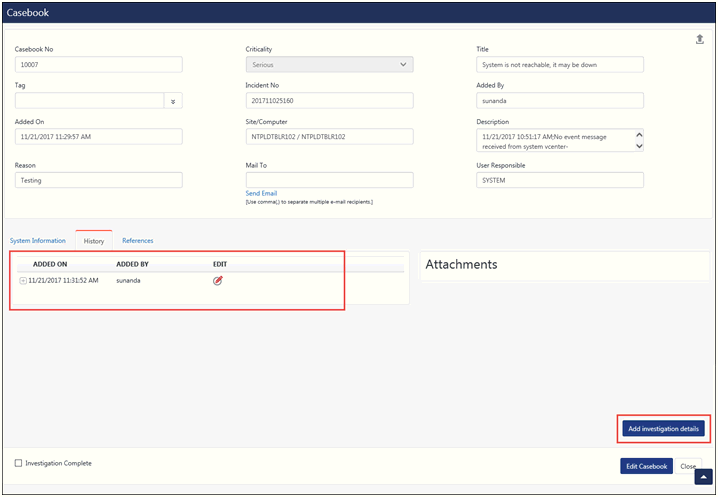
8. To view details of this Incident, click the History tab.
9. To add data to the existing Casebook, click the Edit Casebook button.
10. To add more investigation details, click the Add investigation details button.
11. Once the issue is resolved, click the Investigation Complete option and then click Close.
|
2 NOTE |
|
To reopen an issue, click the Investigation Complete option once again. This privilege is available for an administrator only. User does not have the option to edit Casebook after the existing Casebook has been marked as ‘Investigation Complete’.
|
12. To view details, select the Tools menu and then select Casebook.
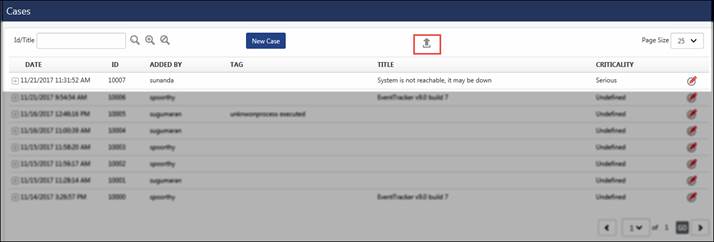
13. To export the search results to Excel file, click the Export icon.
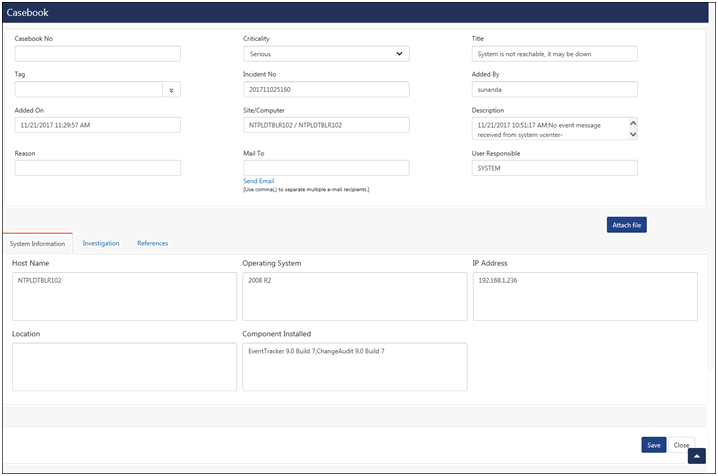
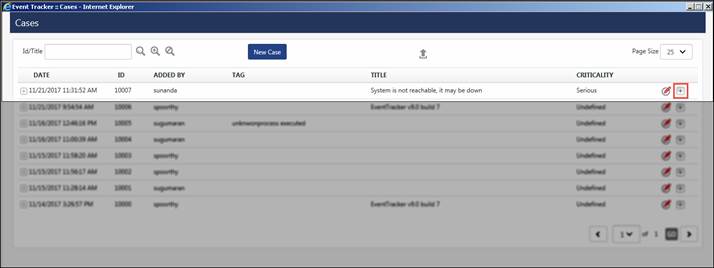
Let us consider an example where a Casebook has already been created as shown in the figure below.

To add information to the existing Casebook from Incidents Dashboard, please follow the steps given below.
a. Logon to EventTracker Enterprise.
Select Dashboard from the dropdown list in Incident.
b. Click the relevant incident (graph) available in Incidents Dashboard.
Search Criteria window displays.
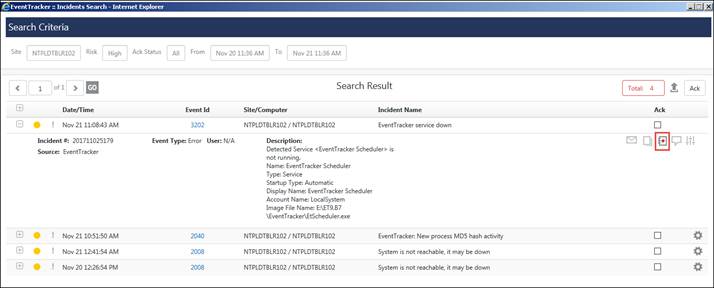
c. Select an incident and click ![]() icon.
icon.
Casebook window displays.
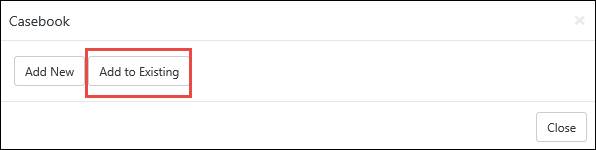
d. Select the Add to existing button.
Details of Casebook entries display.
e. Click Add to Casebook ![]() icon.
icon.
A successful message displays.
f. Click the OK button.
g. To view the existing entries, select the Tools menu, and then select Casebook.
h. Select Edit ![]() icon of respective Casebook entry, and then select the References tab.
icon of respective Casebook entry, and then select the References tab.
The incident that has been added to the existing Casebook will be displayed.
i. You can also export the Casebook in excel format by clicking the icon![]() .
.
|
2 NOTE |
|
You can also add data to an existing Casebook from Reports Dashboard and Change Audit accordingly. |