A set of relevant Categories can be organized under a Group.
This option enables you to organize Category groups whereby you can add, delete, and modify categories in that group.
1 Click the Admin, and then click Category.
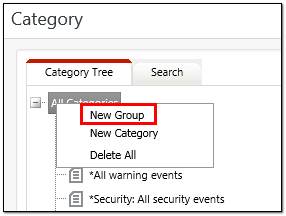
2 Right-click All Categories or any other Category group.
EventTracker displays the shortcut menu.
3 From the shortcut menu, click New Group.
|
2 NOTE |
|
If you select any other group than All categories, then the new group you create will be created as a sub-group under the group which is indicated in the Parent Node field. |
|
Field |
Description |
|
Parent Node |
Name of the parent group under which EventTracker adds the newly created group as a sub-group. |
|
Enter Group name |
Type the name of the group. |
4 Type the name of the group in the Enter Group Name field.
5 Click OK.
EventTracker creates the group under the selected parent group.
Follow the same procedure to create sub-group(s).
6 Click Reports drop down, and select Operations.
EventTracker displays the newly added Category group under the selected parent group.
This option enables you to modify a Category group.
1 Right-click the group that you want to modify, and then select Edit Group.

EventTracker displays the Edit Group page on the right pane.
2 Type appropriate group name in the Enter Group Name field.
3 Click OK.
|
2 NOTE |
|
You cannot edit the name of the Parent Node. |
This option enables you to remove a Category Group.
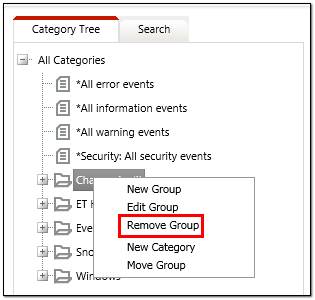
1 Right-click the group that you want to delete, and then select Remove Group.
EventTracker displays the Confirmation message box.
2 Click OK to remove or Cancel to abort.
This option enables you to modify a Category group.
1. Right-click the category that you want to modify, and then select Edit Category.

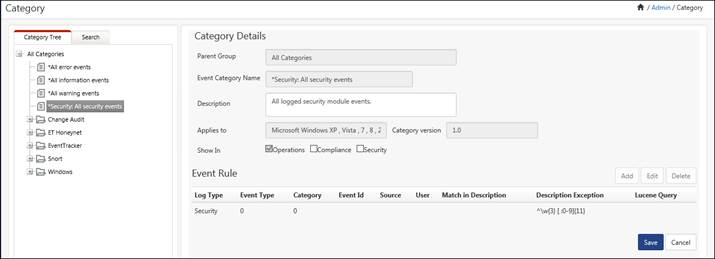
Category Details pane displays. Only the few options are editable.
2. If required, enter the Description:.
3. If required, select Compliance and Security options, and then select the Save button.
|
2 NOTE |
|
You cannot edit the name of the Parent Node. |
This feature is used to make a copy of the existing category.
1. Right-click a category and then select Clone Category.
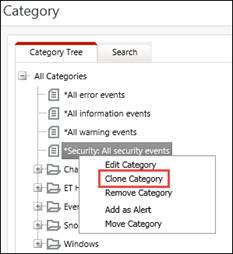
Category Details pane displays.
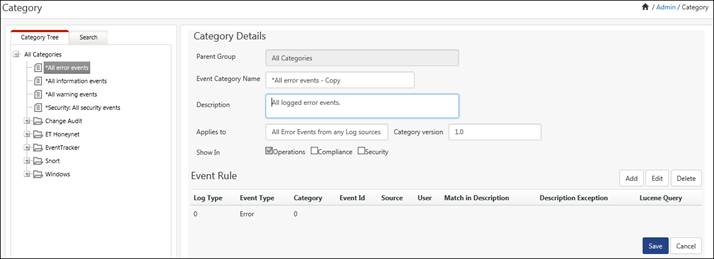
2. To add a new event rule or edit a rule, click the Add or Edit button.
3. Click the Save button.
This option enables you to remove a Category Group.
1 Right-click the group that you want to delete.
EventTracker displays the shortcut menu.
2 From the shortcut menu, click Remove Group.
EventTracker displays the Confirmation message box.
3 Click OK to remove or Cancel to abort.
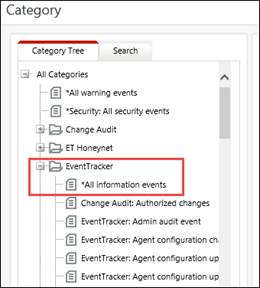
A set of relevant events can be grouped under a Category. For example, you can create a set of MS-Exchange events under one Category and use this Category to show all events that occurred in MS-Exchange. This is far easier and flexible than generic reports.
This option enables you to organize categories in an ordered manner. You can create, modify, and delete the categories.
1. Right-click the groups where you want to add Categories.
EventTracker displays the shortcut menu.
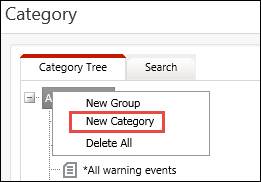
2. From the shortcut menu, click New Category.
EventTracker displays the Category Details page on the right pane.

|
Field |
Description |
|
Parent Group |
The parent node under which the new category is created. |
|
Event Category Name |
Type the name of the Event Category. |
|
Description |
Type a brief description of the Event Category. |
|
Show In |
This field allows you to add the new category to be shown under the Operations, Security, and/or Compliance Tree. Any new category by default will be added under Operations. |
|
Applies to |
Type the name of the application or server for which the category is created |
|
Category Version |
Type the version of the category. |
3. Enter appropriate data in relevant fields.
4. Click Add to add Event Rule.
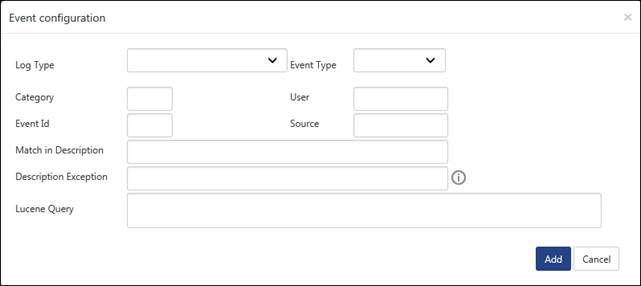
EventTracker displays the Event Configuration pop-up window.

|
Field |
Description |
|
Event Rule |
|
|
Event Type |
Select an event type from the drop-down list. The option describes the types of events Error, Warning, Information, Audit Success, Audit Failure, Success, Critical, and Verbose. |
|
Category |
Type the category number in this field. This field supports numeric data type only. |
|
Log Type |
This field describes the options are System, Security, Application, DNS Server, File Replication, and Directory Service. |
|
Event ID |
Type the event ID number in this field. This field supports numeric data type only. |
|
Source |
Type the source in this field. |
|
User |
Type the user name in this field. |
|
Match in Event Description |
Type a sub-string of the description that needs to be matched. |
|
More information |
Type the additional information about the event category in this field. |
|
2 NOTE |
|
If a field is left blank, a wildcard match for that field is assumed. For example, leaving the user field blank implies that any value in that field is acceptable. |
5. Enter appropriate data in the relevant fields.
6. Click Add and then click Save.
This option helps you modify Categories.
1. To modify categories, right-click the Category to modify, and then select Edit Category.
EventTracker displays the shortcut menu.
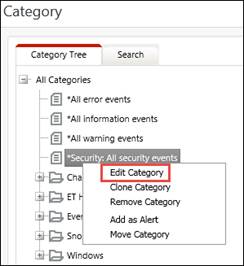
2. From the shortcut menu, click Edit Category.
EventTracker displays the Category Details page on the right pane.
3. To edit event details, select an event and then click Edit.
EventTracker displays the Event Configuration pop-up window.
4. Enter appropriate data and then click Save.
|
2 NOTE |
|
You can edit only the custom created categories. The pre-defined categories cannot be edited. |
This option enables you to delete a Category.
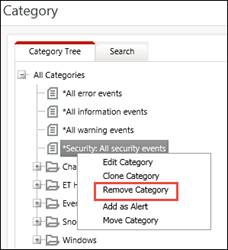
1. Right-click the Category to remove, and then select Remove category.
Message from webpage displays.
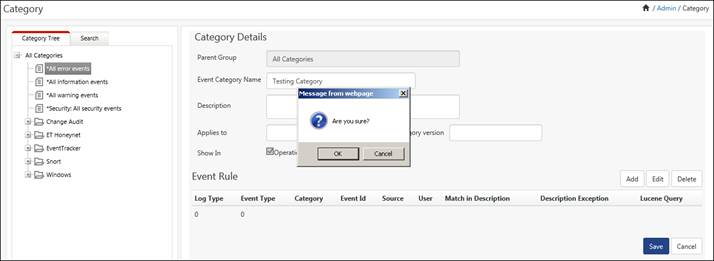
2. Click OK.
EventTracker deletes the selected Category.
This option helps you delete Event Rules.
1. Right-click the Category that you want to edit.
EventTracker displays the shortcut menu.
2. From the shortcut menu, click Edit Category.
EventTracker displays the Category Details page.
3. Select the Event Rule that you want to delete.
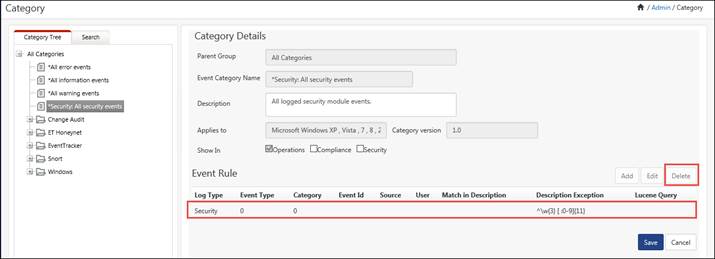
4. Click Delete.
EventTracker displays the Confirmation message box.
5. Click OK.
EventTracker deletes the selected event rule.
6. Click Save on the Category Details page.
This option enables you to add Categories as Alerts.
1. To add a category as an alert, right-click a category, and then select Add as Alert.
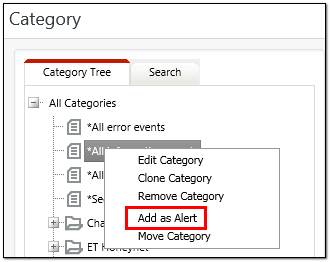
Alert Configuration window displays.
2. Enter Alert Version:, Applies To: fields.
For more details regarding How to Configure an Alert, please refer Alerts.
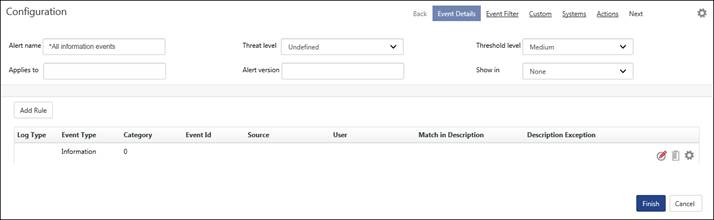
3. Select/Enter the required fields, and then select the Finish button.
For more details, please refer Add Custom Alerts.
This option helps you to move categories.
1. To move a category, right-click the category and then select Move category.
EventTracker displays the shortcut menu.

Category Details window displays.

1. Select Destination, and then select Show In: any options.

2. Select the Save button.
The category ‘*All information events’ has been moved from its current location.